Thursday, 16 October 2025

Oh, The People You’ll Need When You’re Building a Wall!

Hello dear readers, I’m glad you are here,
I’ve a tale of construction, so lend me your ear.
You think it’s just bricks, a roof and some glass,
But wait till you see all the people who pass!

I’m Phil the Architect, building’s my beat,
And today let me show you the folks that I meet.
From projects to processes, people galore,
You’ll soon see there’s always… one more, and one more!


At first it looks simple, so easy to define:

A client with needs, an architect to design.

A contractor who builds, the project is done,

Everyone’s smiling - Hooray, job well-won!


But wait just a moment, don’t clap yet at all,

For buildings need people - a whole human hall!

Yes, client and builder, and me with a plan,

But add in the others?… oh yes, yes we can!


But before we break ground or put shovel to soil,

A long list of people begins to uncoil.

Surveyors and lawyers, the purchasing crew,

Contracts and agreements stack up too…

The clients get ready to realise their dreams 

But don’t underestimate the team that they’ll need. 


Now let me show you - a kitchen, quite small,

A project in Wandsworth, with a brick wall.

A simple extension, just glass and some light,

North-facing windows that made it look bright.


With tactile materials - oak, brick, concrete,

And details so careful, so slender, so neat.

You’d think “just a kitchen - a builder, that’s all.”

But kitchens need people - not one, but a haul!


For even the simplest, the list starts to grow,

Consents upon consents you need before go:

- A notice from Thames Water (don’t crack the drains!),

- Planning consent (or the council complains),

- Building Control must approve every stage,

- Party Wall Notices (or lawyers engage!),

- Health and Safety (CDM’s the law),

- And freeholders too, if others own a floor.


And then come the people, a circus-sized crew:

Surveyors, inspectors, electricians too.

Plumbers and roofers, asbestos patrol,

Specialist joiners who finish the whole.

You thought it was simple - a builder, that’s all?

But that is not all… oh no, not at all!


A school needed art space, a roof gave the chance,

North light for painting, a room to enhance.

We built it above with the daylight just right,

A studio glowing with soft, even light.


The contractors and teachers, even children joined in too,

Caretakers helping, a practical crew.

For even small projects, the list can be tall…

That is not all… oh no, not at all!


For small works like this, the list rearranges,

The same consents come, with a few little changes.

Budgets are leaner, the trades must be wise,

And sometimes the school’s own team will advise.


A caretaker here, an IT tech there,

A teacher to tell us what children will share.

The line-up is smaller but still quite a crew -

Because even small buildings need many, not few.


On Scotland’s west shore stood a hotel forlorn,
Derelict, crumbling, its grandeur all worn.
We built forty-seven fine bedrooms with pride,
A cinema, spa, and a restaurant inside.


But the list kept on growing, the team was a mass:
From asbestos removers to kitchens and glass.
Through bogs and four farms the new water mains  crawled…
But that is not all… oh no, not at all!


Now picture a project, this large in scale,
With planning consents and approvals to nail.
Consultants and specialists, big names on call,
A fire expert, a cladder, project manager and all.


But once doors are open the list still grows:
With operators, staff, and  all the people you know.
Facilities, cleaners, receptionists too…
It takes a whole army, to see it all through!

(Whilst working at Hugh Broughton Architects)


And then came up Halley, a station of fame,
An Antarctic base with a curious name.
We won the big contest, we built it with pride,
On an ice shelf that drifts with the sea and the tide.


It must rise above snow and ski to new ground,
Or else it gets buried, or lost, or ice-bound.
With months locked in darkness, no sun to recall,
Every detail was life-proof - or no life at all!


Oh, the people it needed, the list was so wide:
From aircraft suppliers to trains on the side.
Cladding for panels, consultants for light,
With SAD lamps to mimic the sun burning bright.


A colour psychologist (yes - one on the call),
To bring warmth and energy to every wall.
And don’t forget stakeholders, some distant, some near -
Communities touched by the project through the year.


From kitchens to villas, from hotels to the Pole,
Each project needs people to make it a whole.
Designers and builders, the big and the small,
It takes every hand - it takes them all.

Consents and approvals, a long list it’s true,
And specialists waiting to work just for you.
So welcome them in - give a nod, make the call…
Oh, the People You’ll Need When You’re Building a Wall!


One more and one more...
(Forgot to add Measured Survey to the group
)


Monday, 7 July 2025

5 Smart Ways to Optimise School Space on a Tight Budget

Small changes can make big differences with real results.

When budgets are stretched and buildings are showing their age, improving your school environment can feel out of reach. But small, strategic changes — grounded in thoughtful design — can make a big difference.

At DesignBox, we work with schools who want better spaces for learning and wellbeing. And we’ve learned that the smartest improvements don’t always start with money. They start with mindset.

This post shares five simple, human-centred ideas you can apply in any school — whether you're rethinking a single classroom or setting out a long-term site plan.
They’re about helping staff feel less overwhelmed, helping students settle faster, and helping every square metre work harder for your school community.

The ArtBox at Furzedown Primary School 


1. Start with the Mood, Not the Measurements

How a Space Feels Often Matters More Than How Big It Is

When you’re working within tight constraints, it’s easy to focus only on functionality or technical performance. But the emotional tone of a space — how it makes people feel — has a direct impact on behaviour, concentration and care.

Even small tweaks in colour, lighting, layout or acoustics can completely shift the dynamic of a room. Think of it this way: a calm room helps people act calm. And a chaotic room often does the opposite.

👉 Next time a space is being refurbished, ask: “How do we want this space to feel?”
Please include this question in your next design brief — whether you're reworking a room or an entire department.


2. Make Every Surface Work Harder

The Secret to Space Isn’t Always More Room — It’s Smarter Use

In schools, spaces often serve multiple roles — but walls, floors and furniture are often underused.

What if walls weren’t just for notices, but helped calm the room through better colour choices or acoustic panels?
What if cupboard doors became pinboards?
What if a floor used subtle zoning — with colour or materials — to guide different behaviours?

Writable surfaces, fold-down tables, and smart storage units can reduce clutter and make every inch of space feel intentional.

👉 Ask: “What’s this wall / shelf / cupboard doing — and could it do more?”
Please include this kind of thinking in your next improvement project — especially where space is tight.

Natural north-light, acoustic pin up boards and off-white colour to walls.  Simple measures to help bring calm in to the classroom environment.


3. Design for More Than One Use

One Room. Several Roles. Less Stress.

No school has the luxury of single-use rooms. But when spaces shift roles without support, they often create more stress than value.

Planning for flexibility doesn’t require expensive remodelling — just thoughtful layout and easy transitions.

  • Use lightweight furniture that one adult can move.

  • Zone the room visually — with rugs, colour, or lighting — to shift the atmosphere between activities.

  • Store key items in mobile units that match each use.

When a space changes role smoothly, staff feel less flustered and students stay better regulated.

👉 Ask: “Could this space serve more than one purpose — without adding stress to the person managing it?”
Please include that mindset early in any refurbishment. It saves time, noise, and hassle later.


4. Think in Vision, Act in Phases

Test Ideas in Real Rooms — Then Build on What Works

You don’t need a big budget to start with a big vision. In fact, the best school environments often begin as sketches and notes — a clear sense of what learning could feel like.

Getting the thinking down costs nothing. From there, test your ideas in small, contained areas:

  • One 1:1 room

  • One department

  • One corner of a shared space

Trial the lighting. Trial the layout. Notice what’s working — for staff and students.

This kind of small-scale prototyping builds confidence and clarity. It helps you refine the wider plan, so you're not guessing when it’s time to invest.

👉 Ask: “What’s one space where we could try this?”
Please include pilot testing in your design strategy — it’s how smart schools reduce cost and improve outcomes.

Natural and artificial lighting control in the ArtBox for flexibility of tasks.  


5. Design for People First — and Performance Will Follow

Focus, Calm and Belonging Aren’t Bonus Extras. They’re the Foundation.

Good learning environments don’t just meet compliance checklists — they support the people in the room. And that support doesn’t have to come at a premium.

Designing with wellbeing in mind means:

  • Choosing colours that soften, not stimulate

  • Organising space to support natural routines

  • Reducing glare, clutter and ambient noise — so the brain isn’t working overtime just to cope

When we get this right, classrooms feel calmer. Transitions go smoother. Staff and students can focus on what matters.

👉 Ask: “What would make this space feel easier, kinder, more human to be in?”
Please keep people at the centre of your design thinking. That’s how better outcomes begin.


Small Shifts. Stronger Schools.

Better school spaces aren’t about chasing perfection — they’re about making things work better for the people who use them. With the right mindset, even modest tweaks can ease stress, boost focus, and create calmer, more purposeful environments.

You don’t have to do everything at once.
But you do need a starting point.

If you’d like help shaping your school’s design vision — or turning an idea into a realistic, phased plan — we’re here for that.
👉 Book a free enquiry call
You don’t need all the answers. Just the sense that something could be better.


Friday, 4 July 2025

Acoustic Design: Designing for Calm

 A quiet look at how sound shapes the way we learn, teach, and feel in schools.

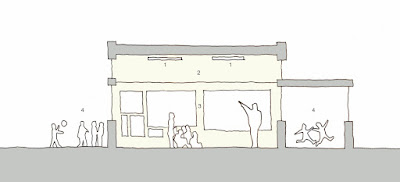
Considering acoustic treatment:
1 Acoustic ceiling panels
2 High level acoustic wall panels
3 Cork and felt lined display boards
4  Sound proofing from outside activities


The Spaces That Talk Back at Us

We all know the rooms.
The ones where the noise just… hangs.
Where staff raise their voices without realising.
Where concentration dips by mid-morning—and tension quietly rises.

Sometimes, it’s not the behaviour that’s the issue.
It’s the acoustics.

Why Sound Matters More Than We Think

Sound affects more than hearing.
It affects attention, memory, regulation, and physical stress levels.
In schools—especially busy urban ones—acoustic quality can change the whole tempo of the day.

For staff:

  • Constant background noise increases cognitive load

  • Voice strain is common (and exhausting)

  • Poor acoustics make behaviour management harder than it needs to be

For students:

  • Processing language in a reverberant room can increase anxiety and reduce engagement

  • For neurodiverse learners, the impact can be overwhelming

The Department for Education sets minimum standards in BB93.
But many buildings, especially older ones don’t meet them—and often refurbishments don’t prioritise them.
And yet the difference can be felt within days of making changes.

According to Sharon Baker, an acoustics expert at Ecophon:

  • A standard classroom might have a reverberation time of 1.2 seconds—resulting in echo and elevated ambient noise.

  • Teachers may need to speak over the background, which can strain vocal cords and cause long-term issues.

  • Classrooms with ceilings higher than 2.8m are more prone to echo.

  • If the back row of desks is more than 9m from the teacher, speech intelligibility drops dramatically.

  • Noise from corridors, playgrounds or adjacent rooms can interfere with focus unless sound insulation is considered.

  • For pupils with hearing loss, visual impairments, autism, ADHD or EAL needs, greater sound absorption is essential. A reverberation time of 0.4 seconds is typically recommended.

What Can Be Done (Without a Major Overhaul)

This isn’t about spending a fortune or gutting classrooms.
It’s about small interventions, well placed.

Some practical strategies we’ve seen work well:

  • Acoustic ceiling panels in high-ceiling classrooms to reduce echo without compromising sense of space

  • High-level wall panels on front or rear walls, where display space isn't needed

  • Swapping hard surfaces for soft ones: felt-lined cork display boards, carpet and underlay, beanbags or soft furnishings in reading corners

  • Soundproofing from outside sources where necessary

  • Rethinking zoning: avoid placing quiet workrooms next to echoey corridors

  • Designing in sound absorption, not just adding furniture

These aren’t just tricks. They’re thoughtful responses to how people experience sound.

Acoustic performance can even be assessed using a smartphone decibel app. If the classroom regularly peaks above 65dB during lessons, it may benefit from acoustic treatment.

Typical costs for acoustic interventions range between £2,500 to £3,500 + VAT, adjusted for inflation from 2013 estimates.

Listening is Part of Design

At DesignBox, we don’t come in with fixed answers.
We listen—to your staff, your students, your site.
Sometimes what’s needed is a tweak. Sometimes it’s a sequence of improvements, phased over time.
But always, the goal is the same: to make the space work with your school—not against it.

Want to Explore This in Your Context?

If there’s a space in your school that feels “off” acoustically—and you’re not sure where to start—feel free to get in touch.

Book an enquiry call
We’ll ask a few questions, listen carefully, and help you think through what’s possible.
No pressure. No jargon. Just thoughtful support.

Thanks

Phil

DesignBox Architecture Ltd

Listening with design—so schools can flourish.

Thursday, 5 June 2025

What Does a Home Extension Really Cost? A Complete Guide for Homeowners


If you’ve ever tried to work out the cost of a home extension or renovation project, you’ll know how confusing and opaque it can feel. “How much will it cost?” often gets a vague “Well… it depends.”

So let’s break the fog.

This post is your no-nonsense breakdown of typical costs, based on projects in Southwest London — including building work, professional fees, consent charges, and everything in between.

👉 Book a free discovery call to get early clarity and support on your next steps.


1. Building Costs

This is the price of the construction work itself — what your builder will quote for labour, materials, and subcontractors.

Project Type     Typical Build Cost (per m², ex VAT)
Rear Extension                                 £1,800 – £3,500
Loft Conversion     £1,500 – £2,500
Interior Refurbishment     £500 – £1,600

Item     Typical Range (ex VAT)
New Kitchen     £10,000 – £50,000 +
Each New Bathroom / Shower Room     £5,000 – £15,000 +

These ranges depend on the complexity of installation, number of units, layout changes, plumbing, lighting, finishes, and appliances. High-end projects or bespoke cabinetry can push the upper limits — while budget solutions (like flat-pack ranges) can keep things lean.

To estimate your overall build cost:

  • Multiply your project area by the rates above

  • Add in any kitchen, bathroom or joinery items

Then multiply by 1.6 to allow for VAT, design fees and contingency.


2. Design Fees (Architect + Consultants)

These are approximate fees for the professionals helping you design and manage your project.

ServiceTypical Cost (ex VAT)VATTotal (Inc VAT)
Architect – Planning Design & Application£2,000£400£2,400
Architect – Thames Water Drawings£500£100£600
Architect – Building Regs Drawings£1,200£240£1,440
Architect – Tender Pack for Builders£1,800–£3,000£360–£600£2,160–£3,600
Interior Design (Optional)£1,000£200£1,200
Architect - Site Monitoring (per10 hrs.)£1,000£200£1,200
Structural Engineer (Steel calcs, drawings)£2,000£400£2,400
Measured Survey£600 – £1,500£120 – £300£720 – £1,800

Tip: fees can scale with complexity — your architect can advise on scope and what's necessary.


3. Consent Fees (Statutory Applications)

Some of these are fixed by law or external bodies — but all are essential to getting your project off the ground (legally!).

ConsentBudget Cost (ex VAT)VATTotal (Inc VAT)
Planning Application (Householder)£206£0£206
Lawful Development Certificate (optional)£103£0£103
Building Control Fee (based on £150k build)£900£180£1,080
Thames Water Build Over Agreement£286£57.20£343.20
CCTV Drainage Survey & Report£330£66£396
Party Wall Surveyor (per neighbour)£1,200£240£1,440
CDM Principal Designer Role£1,000£200£1,200


4. Other Project Costs

ItemCost 

Freeholder Consent (if developing a flat)£TBA

Insurance for Construction Works£300 – £600
- Usually provided by specialist brokers
Solicitor's Fees (if required)£TBA


Ballpark Example

Here’s a rough total for a 40m² single-storey rear extension, mid-spec:

  • Build Cost: £2,500/m² × 40m² = £100,000 + VAT = £120,000

  • Design + Professional Fees = £12,000–£16,000

  • Consents + Surveys = £4,000–£6,000

  • Contingency (10%) = £12,000

  • VAT (20%)

  • TOTAL = £177,600 – £184,800 (give or take)


Why Transparency Matters

One of the biggest myths in residential projects is that all these costs go to “the architect.” In reality, your architect helps you orchestrate these moving parts — but many of the fees go to other specialists, regulatory bodies, and third-party consultants.

That’s why we break everything down clearly for our clients — so they can make informed decisions, plan ahead, and avoid costly surprises.


Ready to Explore Your Ideas?

If you’re thinking about a home extension or renovation and want to understand what it could cost — let’s chat.

👉 Book a free discovery call to get early clarity and support on your next steps.

Friday, 30 May 2025

Thinking of a Home Extension or Renovation? Here’s What You Need to Know


House extension project process flow diagram

Building work is rarely straightforward. Even a standard home extension can involve up to five statutory consents. Managing these properly is key to keeping projects on time and on budget.

That’s why we offer a free Zoom consultation for homeowners — to help you understand the process before you commit to your project.


👉 Book a free discovery call here to talk through your ideas and get a clearer picture of what’s involved.


Whether you’re dreaming of a light-filled kitchen extension, a loft with a view, or rethinking your entire layout, carrying out private residential refurbishments and extensions is a big undertaking. It’s costly, time-consuming, and often stressful. The construction industry is complex and fragmented, and without the right guidance, projects can quickly become overwhelming.

A good architect helps untangle all of this — ensuring your vision is realised with fewer surprises, better coordination, and more confidence.


The Three Phases of a Successful Home Project

We divide the project process into three clear stages, aligned with the RIBA Plan of Work:

1. Design Stage (RIBA Stages 0–3)

Here we work together to define your brief and develop a design that reflects your needs, aspirations and budget. This includes everything from initial concept sketches to submitting your Planning Application and acting as your ‘agent’ through the planning process.

2. Detail Stage (RIBA Stages 3–4)

We help with preparation of the technical drawings and documents needed for Building Control and other approvals, and for your builder to price the works accurately.

3. Construction Stage (RIBA Stages 4–6)

This includes working with you on the appointment of your builder, coordinating site works, and ensuring all compliance is met through to the completion of your.


The 5 Key Statutory Consents (That Often Catch People Out)

Depending on your project, the following consents might be required:

1. Planning Permission

Most extensions and lofts will require formal planning approval. Even if your proposals fall under Permitted Development, we recommend a Certificate of Lawfulness is applied for instead, to ensure the Council agrees. Getting the application right the first time is key to avoiding delays later.

2. Building Control Approval

Most projects will also require Building Regulations approval. A ‘Full Plans’ submission is recommended to catch design or compliance issues before works start on site.

3. Thames Water Build Over Agreement

If your project is within 3 metres of a shared sewer, you’ll need permission from Thames Water. This usually involves:

  • A CCTV drainage survey and report
  • Architectural or design drawings of your proposals for Thames Water approval
  • A formal application

4. CDM Health & Safety Compliance

Under the Construction (Design and Management) Regulations 2015, sets out criteria requiring most domestic projects to require a ‘Principal Designer’ to coordinate the health and safety aspects of your project during the design and construction stages. 

5. Party Wall Awards

If your works affect a shared wall, boundary, or nearby structure, you’ll likely need to serve Party Wall notices to your neighbours. If they ‘dissent’, you’ll need a Party Wall Award with each relevant neighbour from a party wall surveyor.


Important to note - As the homeowner, you’re legally required to have someone act on your behalf to manage Building Control and Health & Safety design compliance (known as CDM). These are two separate roles, but confusingly, both are called “Principal Designer.”

Your architect can take on both roles — but only if they’re appointed through to the end of the project. If not, someone else needs to step in. This could be your contractor, but make sure they have the right Professional Indemnity Insurance to cover it.

Yes, it’s confusing. Yes, it’s fragmented. That’s why it helps to have someone experienced by your side. 


+ Additional Consent for Leaseholders: Freeholder Consent

If you own a leasehold property, you’ll almost certainly need formal written consent from your freeholder before carrying out any alterations — including extensions, loft conversions, or internal reconfigurations.

This is not a statutory planning consent, but it is a legal requirement under the terms of your lease. Failing to get it can cause problems down the line, especially if you plan to remortgage or sell.

Key points:

  • It usually involves a formal application with drawings

  • Some freeholders charge fees for reviewing or granting consent

  • It’s advised to check the lease early — some leases prohibit certain alterations outright

Top tip: If you’re a leaseholder, speak to your freeholder before submitting a planning application. It can save time, money, and legal hassle.

Budgeting Your Project: Two Ways to Look at It

Method 1 – Budget-first:

  1. Start with your available capital
  2. Then deduct the following:
    • 10% for contingency
    • 15% for fees and surveys
    • 20% for VAT on construction
  3. The remainder is your construction budget before VAT - and this is the figure that most builders will give you.

Method 2 – Cost-first:

  1. Estimate build costs:
    • Rear extension: £1,800–£3,500/m² + VAT
    • Loft conversion: £1,500–£2,500/m² + VAT
    • Interior refurb: £500–£1,600/m² + VAT
    • New kitchen £10,000–£50,000 + VAT
    • Each new bathroom or shower room £5,000–£15,000 + VAT
  2. Multiply total area by these rates and add kitchen, bathrooms and shower rooms as required
  3. Multiply the result by a factor of 1.6 to cover fees + VAT + contingency

Whichever method you use, it’s essential to understand your total capital expenditure before diving into detailed design.


Other Services That May Be Required

Depending on complexity, your project might also need:

  • A measured survey
  • Structural engineer (for steel design, calcs & drawings)
  • Specialist supplier’s information: Drawings and specifications from specialists contributing to the design and construction of your project
  • Quantity Surveyor: For managing costs on larger/complex jobs
  • Interior design, visuals, and VR: Optional, but powerful for decision-making


Typical Timelines

Here’s a guideline summary of typical time requirements for each step of your project.  It might easily take between 6 and 9 months to progress from the start of a design to being ready to start work on site.
  • Design Stage: 1-2 months
  • Planning Permission Process: 3 months including time for ‘validation’ and decision 
  • Detailing for Building Control and Tender Pack for Builders: 1-2 months
  • Confirming a price with a builder and scheduling in the start of construction: 1-2 months+++
  • Construction: 3-18 months be pending on the size and scope of the project
Top tip: Start speaking to builders early. Their availability often dictates your start date more than anything else!


A Little Known Item…Your Insurance!

Before construction begins, make sure you have the right insurance. Check your builder has the appropriate insurance cover but this will not cover everything, so it is highly recommended you have your own.  Some policies can be extended to cover home renovations, or you can take out a specific contract works policy. Your architect or builder can advise.


Final Thoughts

Your home is likely your most valuable asset — financially and emotionally. Extending or renovating it should be exciting, not overwhelming. Having a qualified, experienced architect by your side not only improves outcomes but saves time, stress and costly mistakes.

If you’re thinking about making changes to your home and want to understand the process properly:

👉 Book a free discovery call here to talk through your ideas and get a clearer picture of what’s involved.


Good luck with your project, and enjoy the process.

Thanks for reading

Phil

DesignBox Architecture